

Air fryer stuffed peppers are a fast, easy dinner. You skip the one-hour oven bake and use the air fryer instead. In about 10 minutes, you get tender peppers filled with seasoned beef and rice. This version uses red, yellow, and orange peppers instead of green. The taste is a bit sweeter, and the plate looks brighter too.
The first time I made these in the air fryer, I filled them the same way I always did for the oven. I packed them right to the top. Half of them split open and spilled filling on the tray. Now I stop just below the rim. Every batch holds together now, with no mess in the basket.
I started making this version on busy nights at home. The old oven method took too long. I wanted a full dinner that didn’t need an hour of waiting once the food was actually cooked. The color swap was almost an accident. The store only had a mixed bag of peppers that day. My family liked the sweeter taste so much that I never went back to all-green peppers, and now it’s just how we make them.
This recipe is for anyone who wants a filling dinner without turning on the oven. It works well for family meals, meal prep, or feeding a crowd with different colors of peppers on the plate. It also reheats well the next day, which makes it a solid lunch option too.

Recipe Quick Facts
- Prep Time: 10 minutes
- Cook Time: 20 minutes
- Total Time: 30 minutes
- Servings: 4 stuffed peppers
- Difficulty: Easy
Before You Get Started
- Use lean ground beef. Fatty beef lets out more grease. That grease pools under the peppers and makes the bottoms wet. I learned this after one batch never firmed up.
- Cook your rice the day before. Hot, fresh rice turns sticky and clumps up in warm filling. Cold rice from the day before stays loose and holds its shape.
- Pick peppers with a flat bottom. They stand up on their own and won’t tip over in the air fryer basket.
- Drain your canned tomatoes first. If you skip this step, the filling gets too wet and the peppers turn watery inside.
- Don’t fill the peppers all the way to the top. Stop just below the rim. The filling puffs up a bit as it cooks, so full peppers can split or spill over.
- Want a milder taste? Use a red onion or a sweet onion. Want more bite? Stick with a plain white or yellow onion.
Ingredients
For the filling:
- 1 pound lean ground beef (93/7)
- 1 tablespoon olive oil
- 1 small white onion, diced
- 1 teaspoon smoked paprika
- 1/2 teaspoon dried sage
- 1 teaspoon dried parsley
- 3/4 teaspoon kosher salt
- 1/2 teaspoon black pepper
- 1 (14.5-ounce) can fire-roasted diced tomatoes, drained
- 1 (8-ounce) can tomato sauce
- 1 1/2 cups cooked white rice, cold (day-old)
For the peppers:
- 4 bell peppers (mixed colors), tops cut off, seeds removed
- 1/4 cup shaved or grated Parmesan cheese (optional, for the top)
Instructions
Step 1: Prep the Peppers
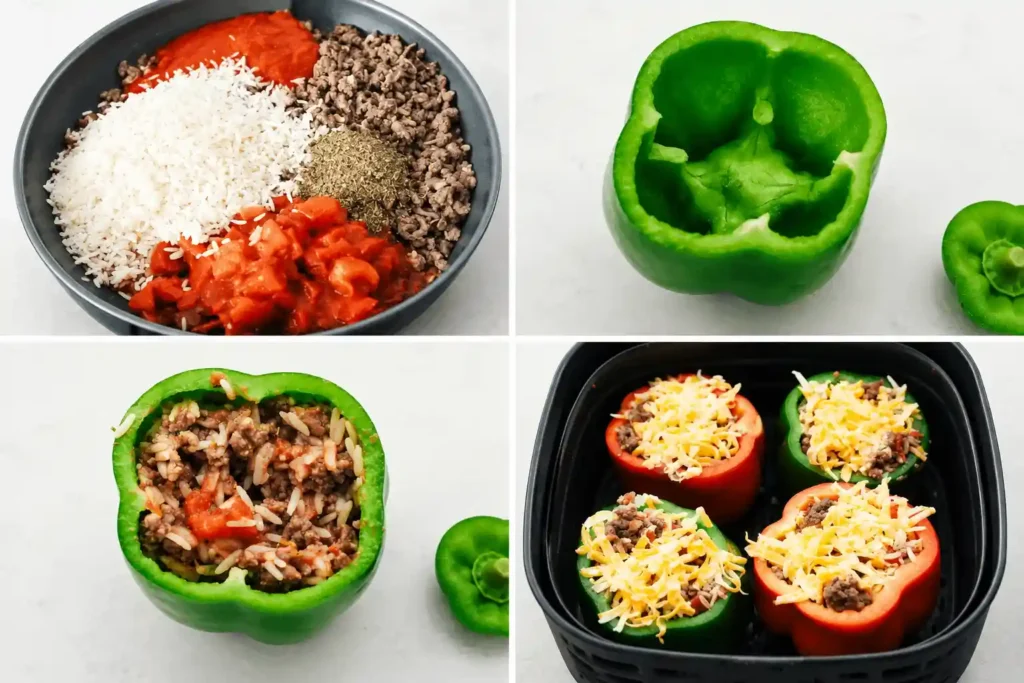
Cut the tops off the peppers. Pull out the seeds and white ribs with your hands. Set the peppers up on the counter while you make the filling. Save the tops if you want, and dice up any usable pepper flesh to toss into the pan later. (I keep a small bowl next to me for scraps. It saves trips to the sink and speeds this step up a lot.)
Step 2: Cook the Onion
Heat the olive oil in a large pan over medium heat. Add the diced onion. Cook it for 3 to 4 minutes, and stir now and then, until it turns soft and clear.
Step 3: Brown the Beef
Add the ground beef to the pan with the onion. Break it up with a spoon or a potato masher as it cooks. You want small, even bits, not big chunks. Cook for 6 to 8 minutes, until no pink is left. (In my kitchen, I always break the beef up more than feels needed here. Big chunks make the peppers hard to eat and hard to fill.)
Step 4: Add the Sauce
Stir the paprika, sage, parsley, salt, and pepper into the beef. Add the drained tomatoes and the tomato sauce. Stir it all together well. Let it simmer for 2 to 3 minutes on low heat so the flavors blend and the sauce thickens just a bit.
Step 5: Mix in the Rice
Take the pan off the heat. Fold in the cold, cooked rice. Stir until the rice is spread evenly through the filling. I found that mixing the rice in off the heat, not on it, keeps the grains from turning mushy and holds their shape.
Step 6: Stuff and Air Fry
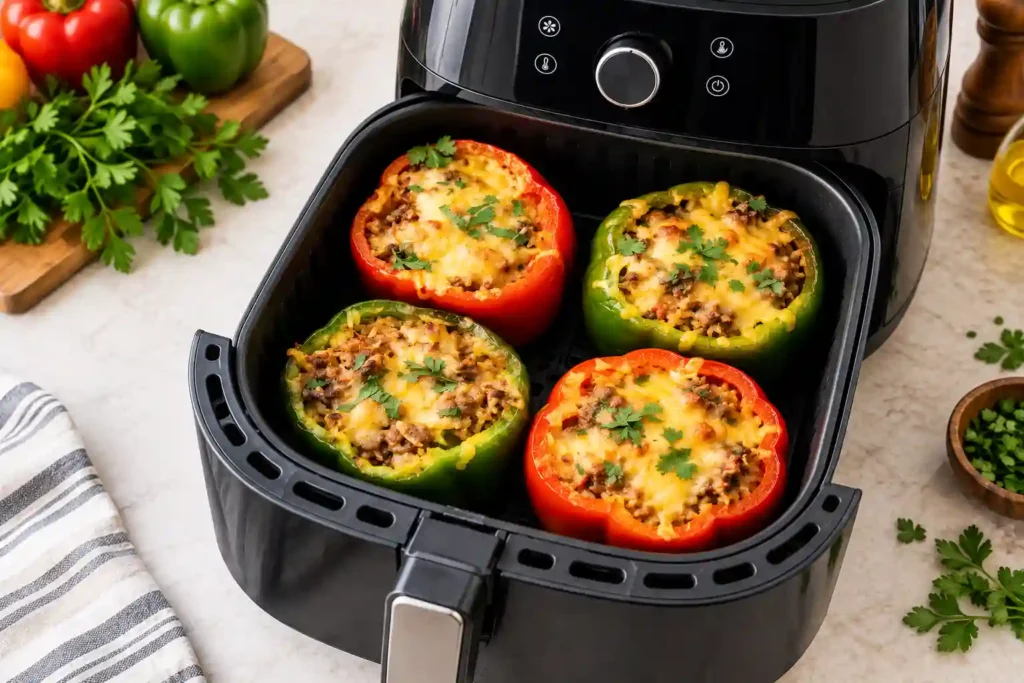
Heat your air fryer to 360°F first. Spoon the filling into each pepper. Stop just below the rim of each one. Set the peppers up in the air fryer basket. You don’t need oil on the tray — the peppers give off enough water on their own. Air fry for 10 minutes, and check them at the halfway point. If you’re using Parmesan, add it in the last 2 minutes so it melts but doesn’t burn.
How To Make (Quick Reference)
- Cut the tops off the peppers and pull out the seeds.
- Cook the onion in olive oil for 3 to 4 minutes.
- Add the beef and cook until browned, in small bits.
- Stir in the spices, drained tomatoes, and tomato sauce.
- Simmer for 2 to 3 minutes, then take the pan off the heat and fold in the cold rice.
- Fill the peppers, stopping just below the rim.
- Air fry at 360°F for 10 minutes. Add Parmesan in the last 2 minutes, if you like.
Tips for Best Results
- Use cold, day-old rice, not fresh rice. This one swap makes the biggest difference between filling that holds together and filling that turns to mush.
- Don’t skip draining the tomatoes. I skipped this once to save a step, and the extra liquid left the peppers watery inside.
- Pick peppers that are close to the same size. They will cook at the same speed and finish at the same time.
- If your peppers still feel firm after 10 minutes and you want them softer, air fry for 2 to 3 more minutes. Don’t just turn up the heat.
- Save any leftover filling. It’s good on its own as a quick bowl, or you can stretch it into a soup.
Ingredient Swaps
| Original Ingredient | Substitute | Effect on Taste/Texture |
| White onion | Sweet onion | Milder, sweeter filling; good match for green peppers |
| White onion | Red onion | Bolder, sharper taste; loses some color when cooked |
| Ground beef | Ground Italian sausage | Richer, bolder filling; more fat overall |
| Fire-roasted tomatoes | Plain diced tomatoes | Milder taste; loses the smoky note |
| Canned diced tomatoes | Fresh diced tomatoes | Looser texture; drain well to avoid extra liquid |
Storage & Reheating
Keep leftover peppers in a sealed container in the fridge for up to 4 days. Reheat them in the air fryer at 350°F for 5 to 6 minutes, or in the microwave in short 45-second bursts until hot all the way through.
Leftover filling on its own freezes well for up to 3 months. To turn it into soup, simmer the filling with beef or veggie stock, sliced carrots, celery, and extra diced pepper for about 15 minutes, until the carrots turn soft.
FAQs
Can I make stuffed peppers in the air fryer without pre-cooking the rice?
You can, but the texture will suffer. Fresh, hot rice is starchy, so it clumps up when mixed into warm filling. Cold, day-old rice stays loose and gives you a filling with soft, separate grains instead of a sticky mass.
Why did my stuffed peppers turn out watery?
Watery peppers almost always come from undrained canned tomatoes or fatty ground beef. Drain your tomatoes well before you add them, and use lean beef (93/7 or leaner) to keep extra liquid out of the filling.
Do I need to cook the peppers first before air frying them?
No. Raw peppers cook fully in the air fryer along with the filling. At 360°F for about 10 minutes, they turn tender with a slight bite, while staying firm enough to hold their shape and the filling inside.
Can I use green bell peppers instead of colored ones?
Yes, green peppers work fine, though they taste more bitter than red, yellow, or orange ones. If you use green peppers, try a sweeter onion, like Vidalia, to balance out the flavor.
How do I know when air fryer stuffed peppers are done?
They’re done when a knife slides in with ease and the filling is hot all the way through, usually around 10 minutes at 360°F. The peppers should be soft but still hold their shape, not fall apart or turn mushy.